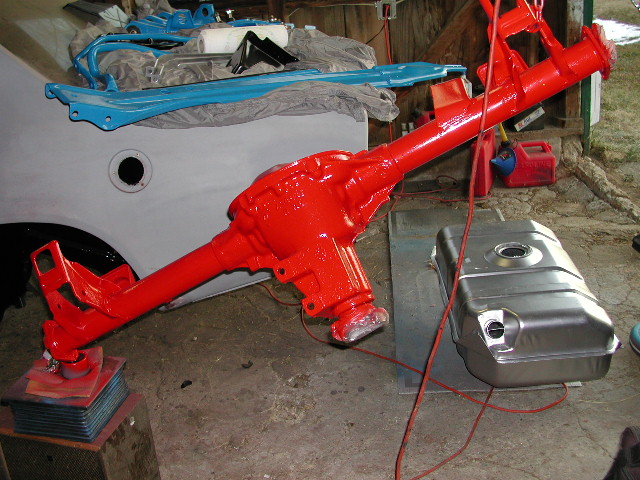
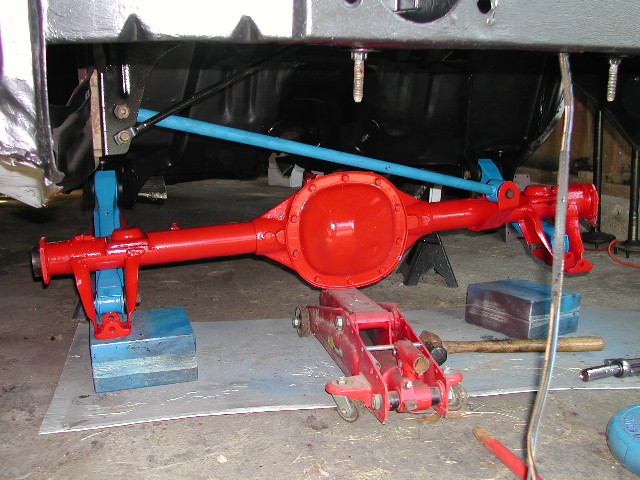
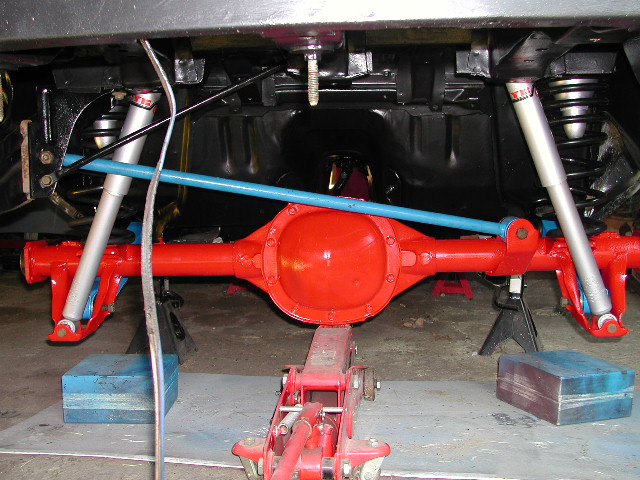
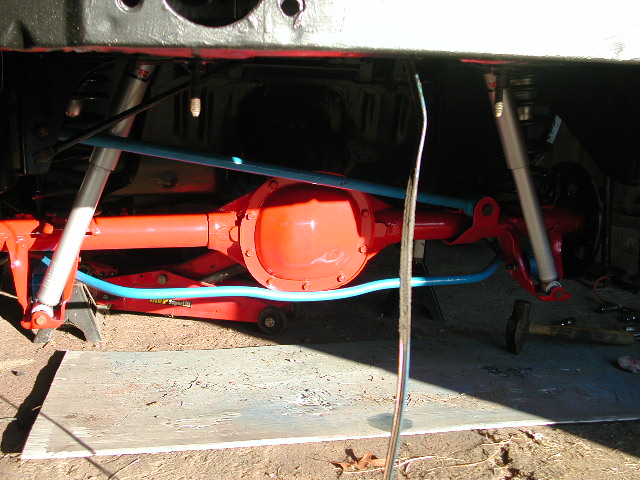
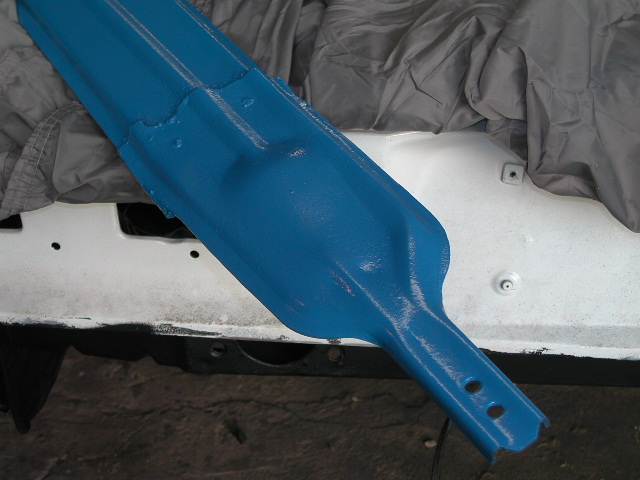
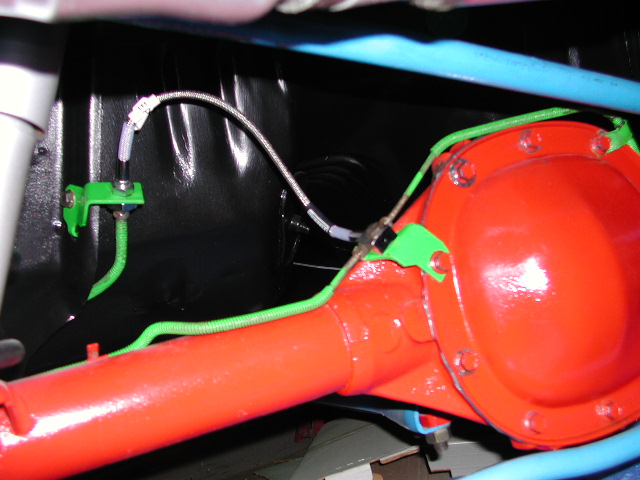
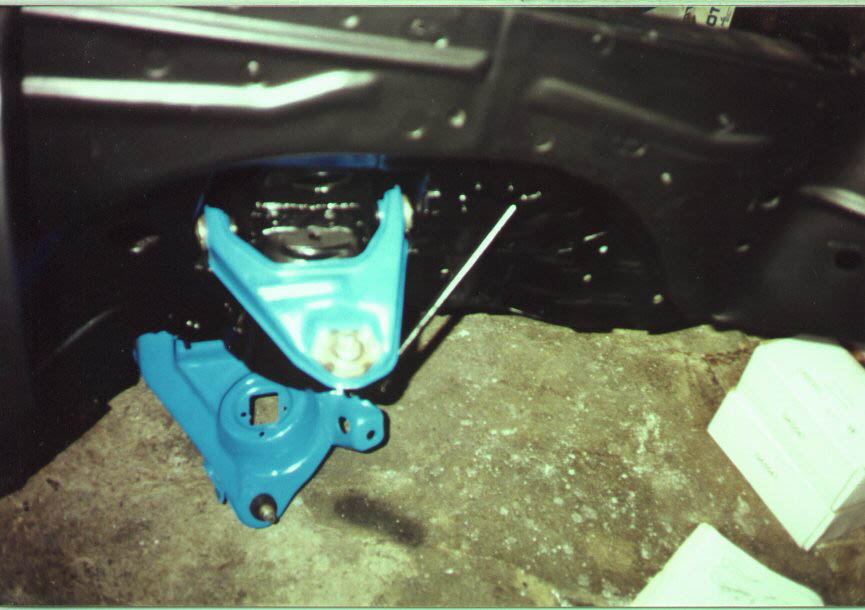
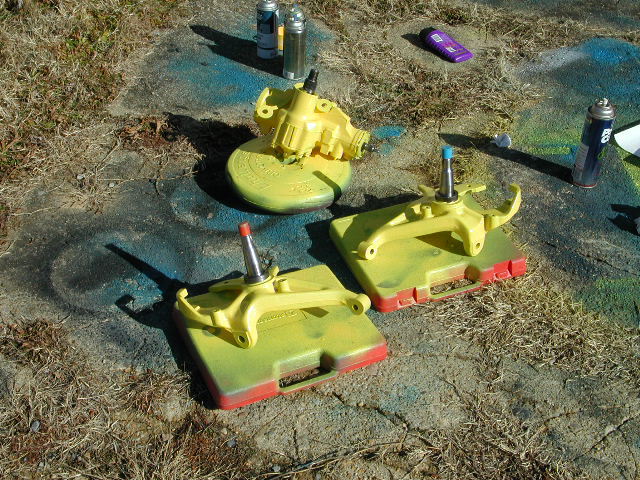
Painted axle housing, painted old parts, Panhard rod bracket installed
When I got the car back, it still had its original 20-year-old factory suspension parts except for "new" 10-year-old front shocks. The car had 140,000 miles. For the heck of it, I got the car running with the original 4-cylinder engine and drove it around the neighborhood. The suspension, steering, and brakes were all very poor. Although I originally wanted to swap the engine first and then work on the remaining systems one-by-one, I realized the result would be a very unsafe car. And to rebuild the stock systems would be a waste of time because even when functioning correctly, they're inadequate especially compared to the more modern cars I had been driving. So, on with the upgrades...
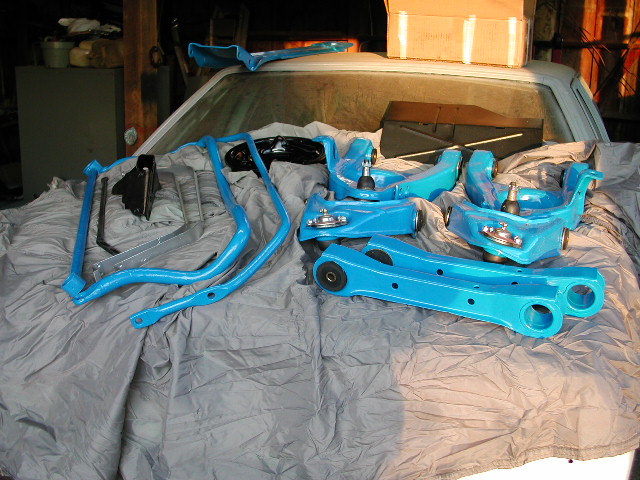
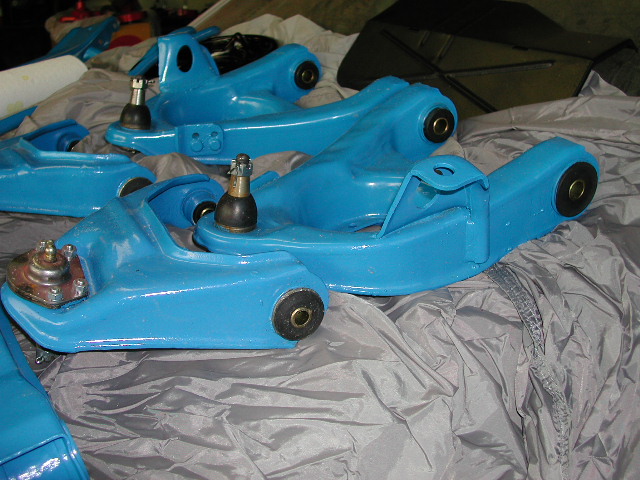
To rebuild the rear suspension, I took off all of the pieces, then removed the old bushings. After heating with a small torch, they popped right out, but the bushing shells in some cases had to be cut and chiseled out. Then I cleaned off all the parts (ack, more undercoating) and painted them. I bought new polyurethane bushings from P-S-T and installed them. Finally, I bolted all of the pieces together.
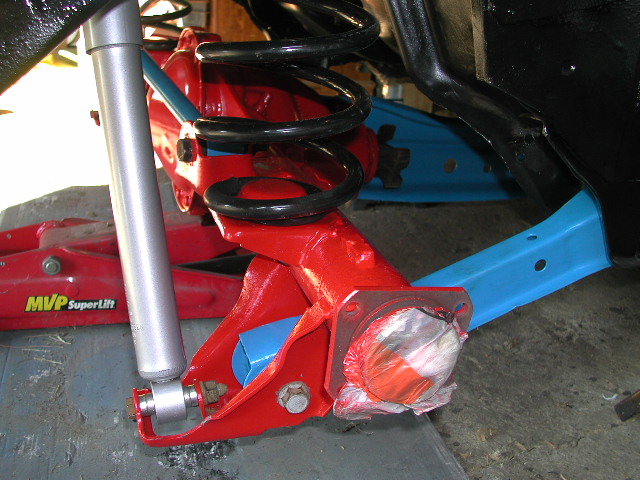
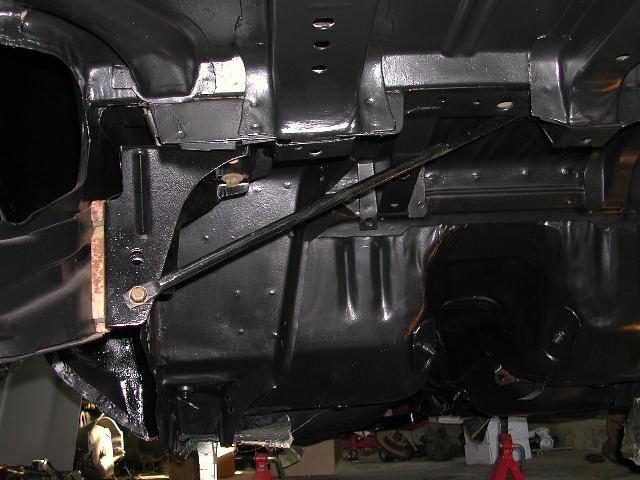
Mounting the torque arm was not simple. Unlike every other H-body, the 2.5l 4-cylinder models use a "lipped" torque arm bushing instead of a round one. This is the same as is used on 1982-current Camaros. It's a little better because this arrangement allows the torque arm to slightly move in and out of the bushing, which may help prevent wheel hop. So, I had to find a way to mount this "oddball" torque arm up to the TH350 transmission I was putting in the car. Plus, the torque arm was now 3.5" too long since the V8 drivetrain sits farther back than the 4-cylinder one.
I could have just used factory parts from a V8 Monza, including the torque arm (round bushing) and TH350 tail housing. But I didn't know where to find those parts at the time (this was before I joined HBOA). I found a B&M kit for putting the TH350 and TH400 into 3rd- and 4th-gen Camaros in a racing catalog. This kit comes with a bracket that attaches between the TH350 body and tailhousing to which the torque arm mounts. Then I bought the "clamshell"-type bushings from a Chevy dealer; ones for a Camaro work on the Monza torque arm. (Beware: although all 1982-up Camaro torque arms are the "lipped" type, the "lips" face different directions depending on the year and drivetrain, so be careful if you go this route!) The specific part numbers I used were: GM 10024028 insulator + supp and GM 00527689 insulator.
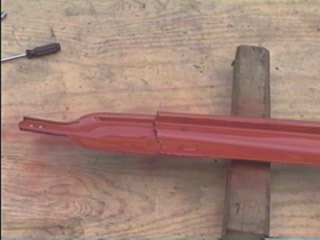
I could finally mount the torque arm to the transmission, but it was still too long. So I cut it into two pieces, overlapped the pieces by 3.5", and welded it together.
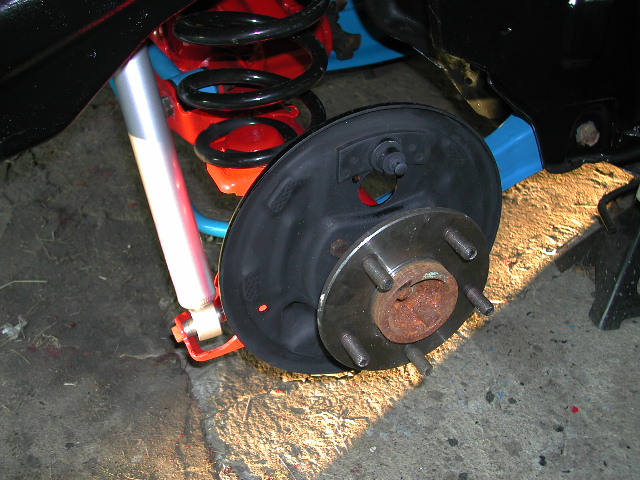
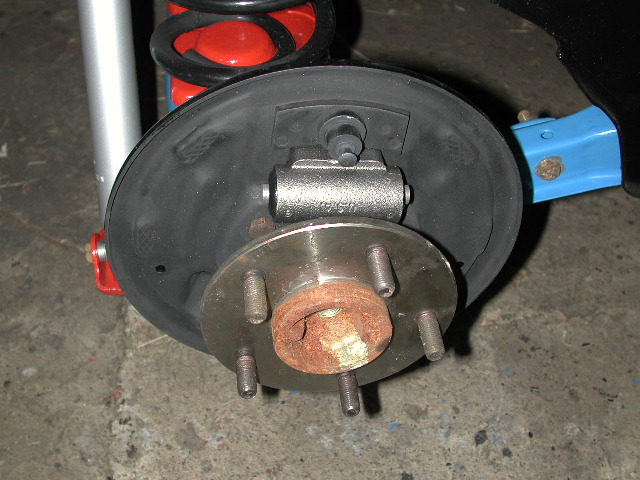
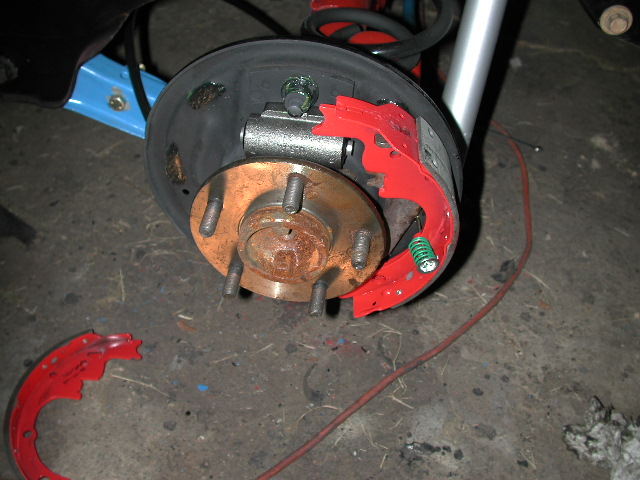
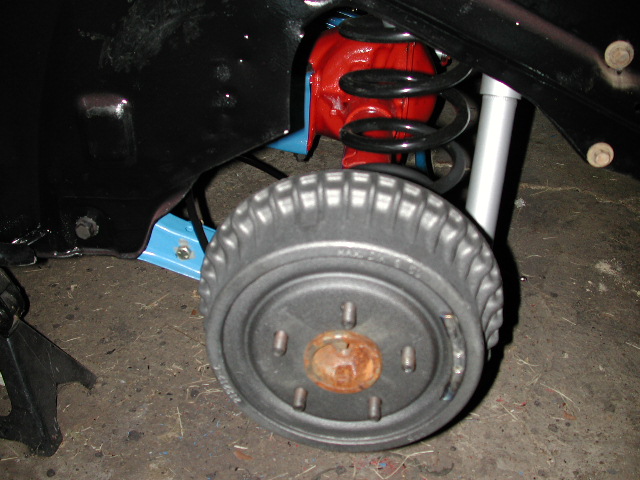
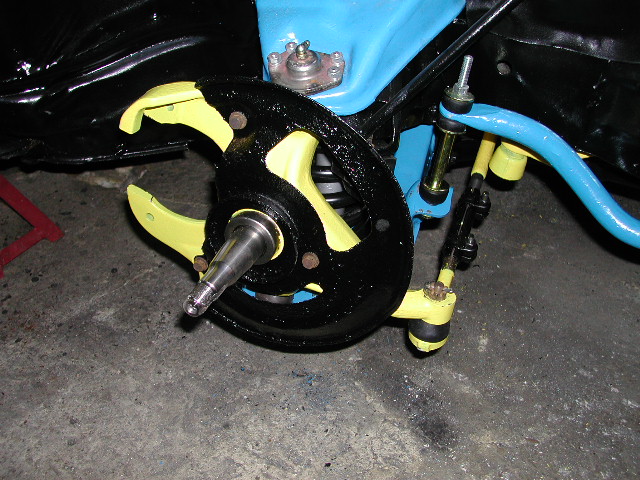
I wanted 5-lug wheels because wheels with the stock 4-lug pattern and brake parts are hard to find. The 5-lug conversion for the rear was easy: 26-spline axle shafts from a 1988 2WD S-10 pickup truck fit into the Monza's rear almost perfectly (GM part number 14030355). As others have noted, the shafts are 1/16" too short, which means that when you bolt the wheel on, it will press the brake drum against the backing plate and it won't turn! You can solve this by grinding the drum or the backing plate, OR do what I did--put a 3/16" wheel spacer between the axle flange and the brake drum. 9.5" 5-lug rear drums from a number of GM vehicles fit the Monza's rear drum backing plates once the axles are swapped--mine are new drums also for a 1988 S-10.
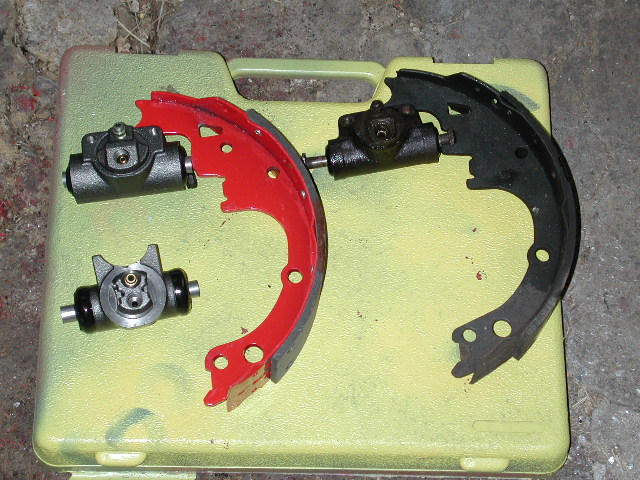
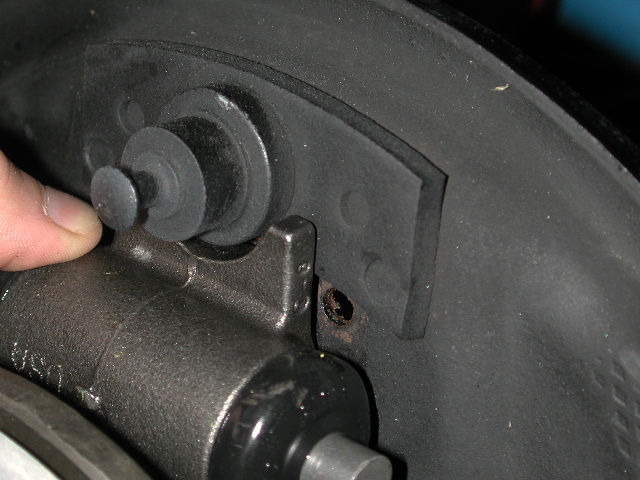
I had "fun" with finding wheel cylinders. First, real Monza cylinders are hard to find. Plus, since I was going to use S-10 brakes up front, I wanted S-10 cylinders in the rear to balance the increase in brake fluid volume (front and rear on the S-10 are both slightly more than the stock Monza parts). In the comparison picture above, you can see a 1997 S-10 wheel cylinder (3/4") with a red brake shoe, along with a 1980 Monza wheel cylinder (11/16") with a dirty brake shoe, along with a 1988 S-10 wheel cylinder. Notice a few things: the S-10 and Monza brake shoes are identical EXCEPT a notch for the longer pistons in the Monza cylinder. The 1997 S-10 cylinder and Monza cylinder bolt into the backing plate, while the 1988 S-10 cylinder uses a flimsy-looking clip. In the next picture you can see this "clip"-type cylinder doesn't seem to fit well in the Monza backing plate, but in the final picture, you can see the 1997 S-10 cylinder does fit.
Once I found the right parts, putting the rear brakes together was not a big deal, but even with the right tools, stretching those springs can be a PITA.


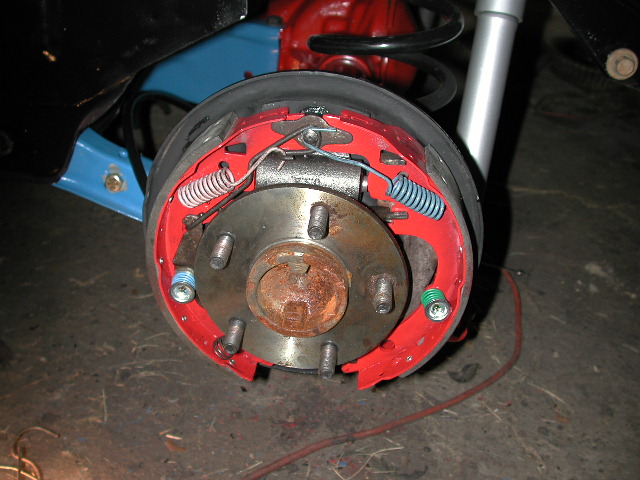
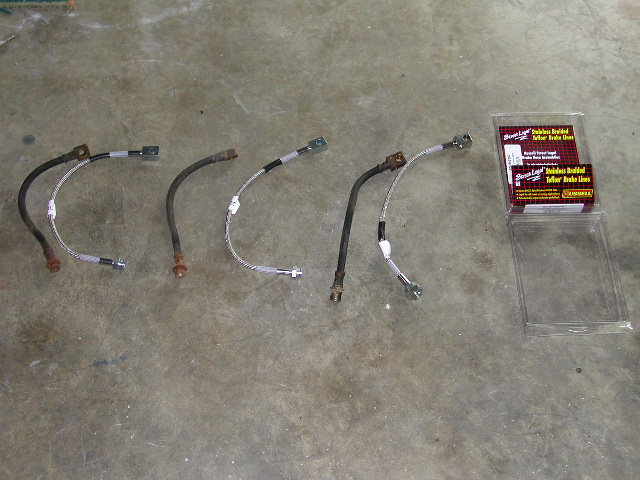
I got stainless steel braided brake lines from Russell--they're really for a first-generation Camaro, but they fit, and no one makes a kit specifically for the Monza. I also painted my brakes green. I'm not quite sure why. More about brakes is in the next section (front suspenstion, brakes, and steering).
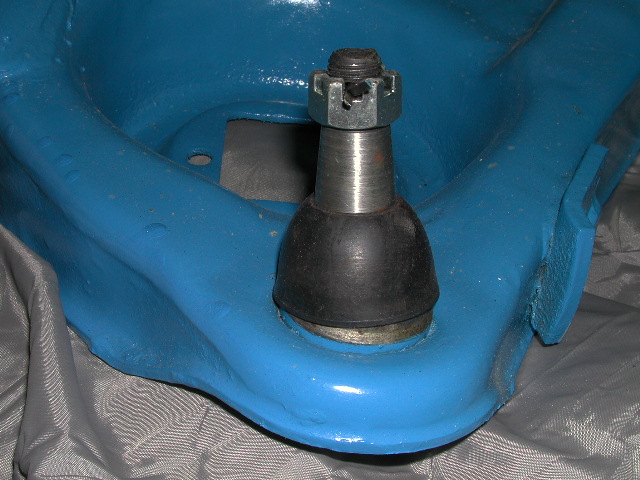
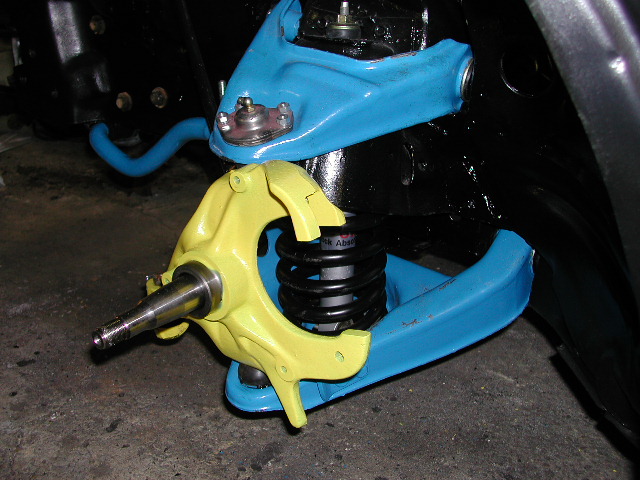
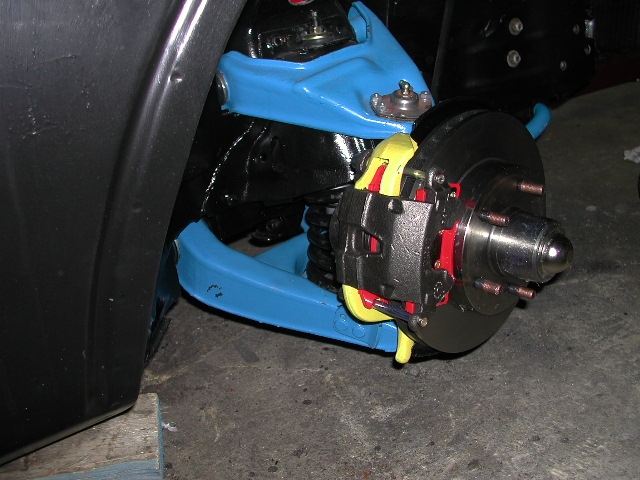
Putting 5-lug wheels on the front is harder than the rear. One option is to redrill the stock rotors, but this puts the wheel studs close to the edge of the rotor hat AND you're still stuck with the stock brakes. A better option is to get replacement spindles from an S-10 or a GM G-Body car (Monte Carlo, Regal, etc--RWD only of course). These spindles are about the same height as the H-Body spindles and the steering attachments match up pretty well too.
The complication with the S-10 and G-body spindles is that they use larger ball joints than the stock Monza ball joints. Unfortunately the S-10/G-body ball joints (they're the same) don't fit the Monza control arms without modification. Again there are a couple of options: put spacers on the Monza ball joint shafts to make them as big as S-10/G-body ball joint shafts or modify the Monza control arms to use S-10/G-body ball joints.
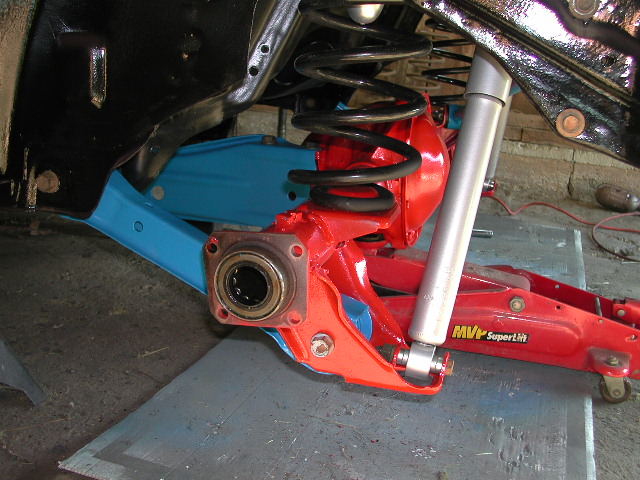
I chose to put S-10 ball joints on the upper control arm. I drilled out the rivets on the original ball joint and it fell out easily. Then I used a Dremel to grind out the hole in the control arm until it was the right size for the S-10 ball joint. This hole is concentric with the original hole so I'm not worried about ill effects on suspension geometry. I also had to drill new holes for the mounting bolts on the ball joint. You can see the ball joint in the upper control arm in the picture below.
STUPIDITY ALERT: I got some spindles from a Pontiac Phoenix. I thought it was a G-Body but it's actually an X-Body. The X-Body uses similar braking components to the G-Body, but the spindle is much taller. I put the spindle on anyway. It obviously doesn't fit and destroys the suspension camber. However I did need to move the car and didn't have my 4-lug wheels anymore, so I used them long enough to make the move.
%20and%20original.jpg)
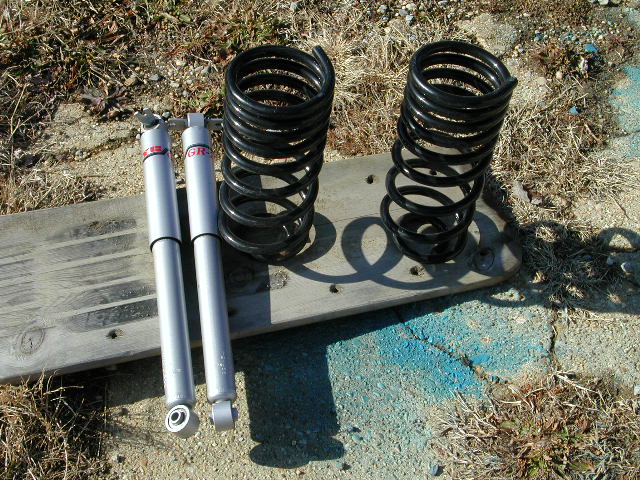
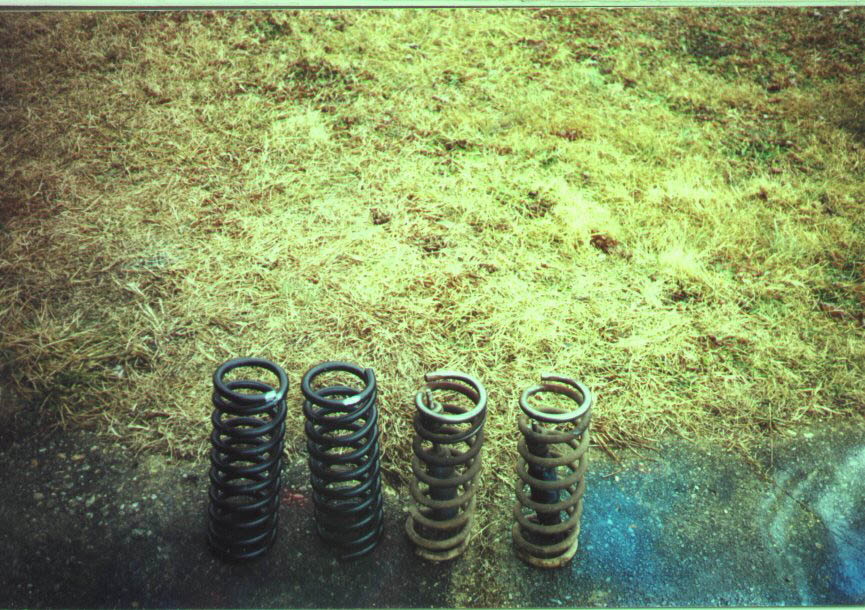
For springs and shocks, I once again used MOOG springs (CS5576 for V8 Monza with A/C) and KYB GR-2 shocks. With all of the pieces, it was time to put the front suspension together...

Installing the front springs started out as a nightmare. These are really stiff springs and there was no weight on the front of the car. The shop manual says to position the spring in the LCA pocket then jack the LCA up until the spindle can be fastened in place. This does NOT work when there is nothing in the front of the car to weigh it down! I'm also convinced that this method wouldn't work for other reasons: the spring is too tall to do this and really stiff springs need too much weight for this to work. So, I tried using a spring compressor. The internal models I tried were too tall for the Monza's springs. External models just get in the way.
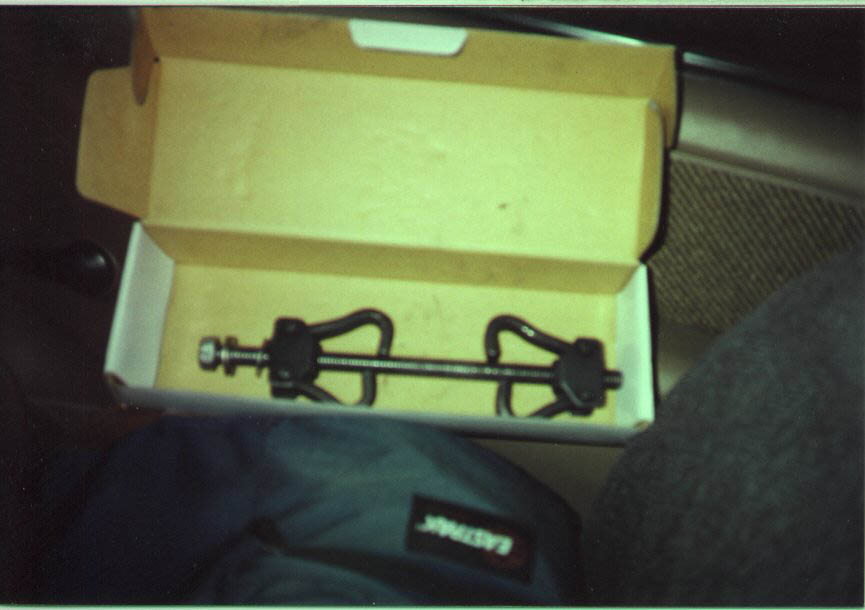
Then I saw a tech tip on a forum for older British cars: use a long threaded rod through the shock hole in the shock tower, with a "plate" low on the spring, to draw the spring up into the shock tower, compressing it. I was about to build or buy such a tool (but they cost $300 from OTC--more from Ford) when I read a tip from a HBOA club member. The tip was to use "half" of the internal spring compressor. It worked! The pictures tell the story. (Note: the final picture is a "mock up" taken after the fact which is why there is extra stuff already installed on the spindle.)
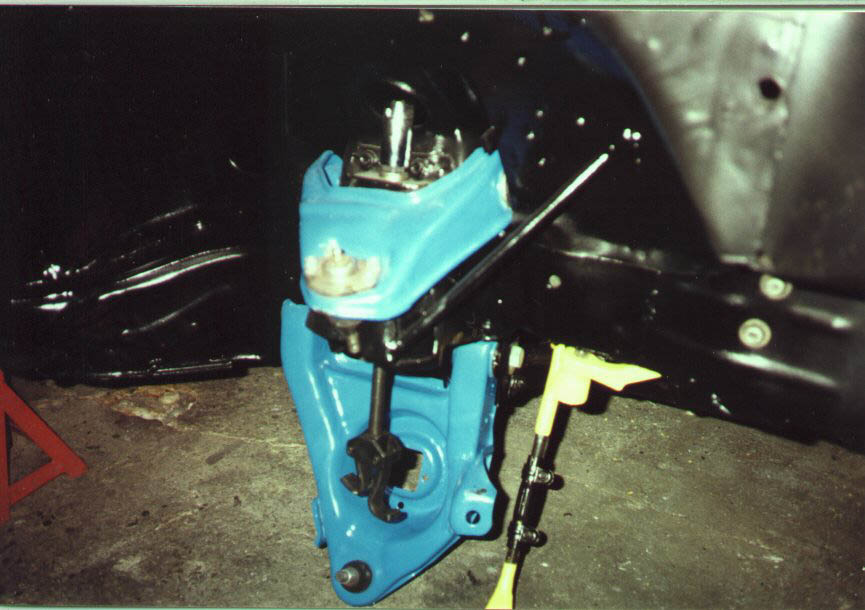
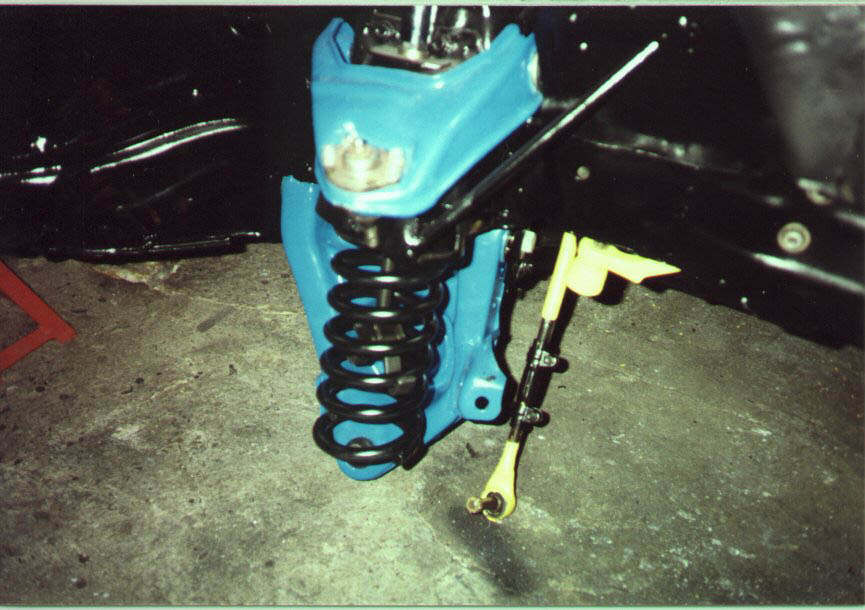


Once the control arms and springs were installed, putting in the shocks and front swaybar was easy. The P-S-T kit included polyurethane bushings for the shocks and swaybar.
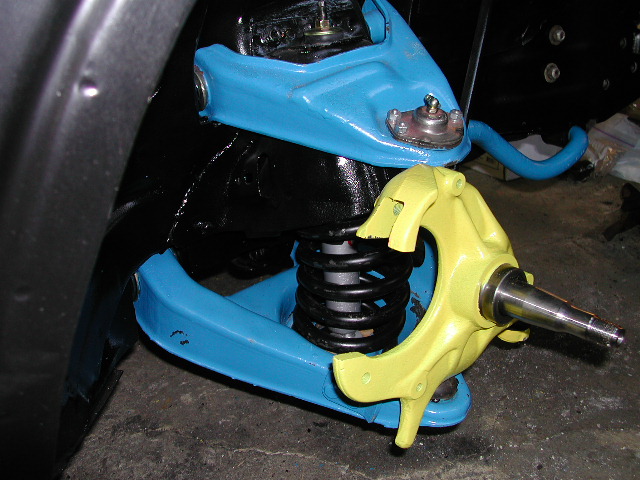
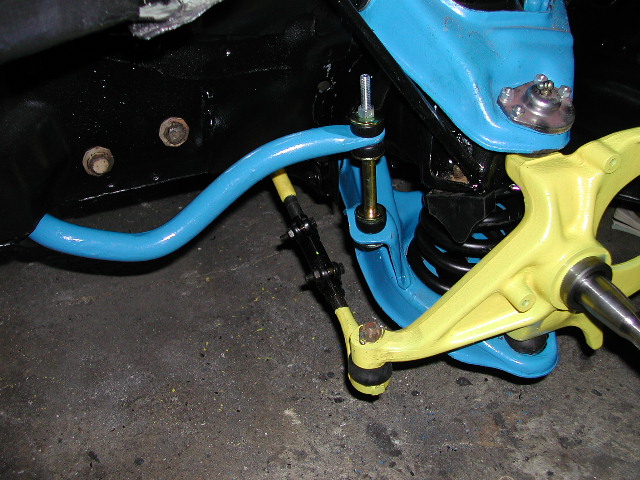
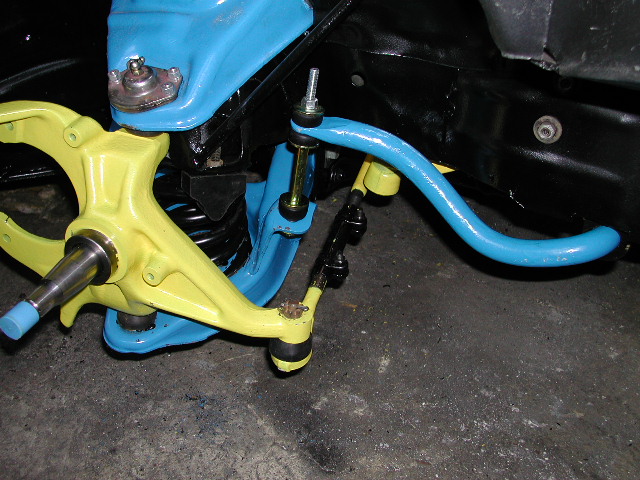
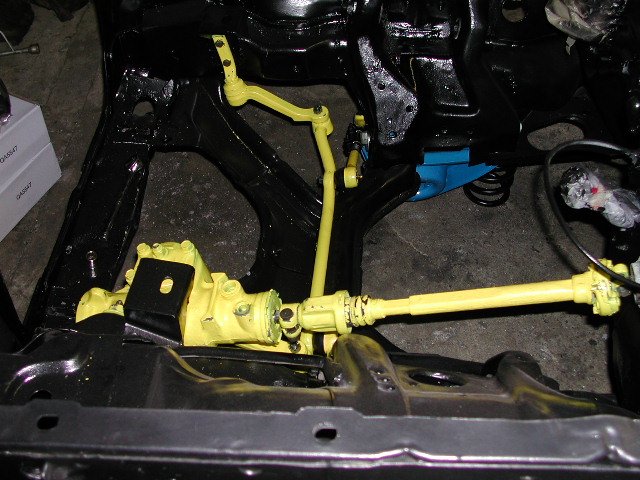
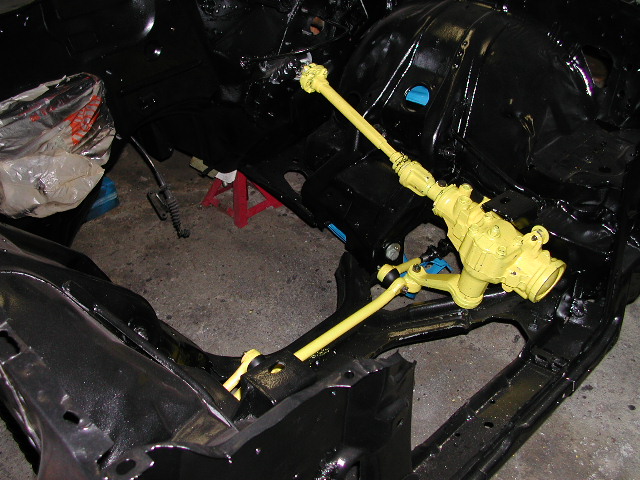
With the spindles in place, I could build the steering system. The spindles are Belltech 2" drop spindles for 1982-2001 Chevy S-10 trucks. I also have a set of regular spindles, in case these turn out to be too low. I chose this route, compared to using shortened springs, to maintain the correct suspension geometry. The steering gear box is from a 1992 Camaro 1LE. It has a quick ratio (12:1), internal stops that seem to work well on a Monza, and bolts right in place of the stock box. The idler arm, relay rod, and tie rod ends are MOOG replacement items. I retained the factory non-tilt steering.

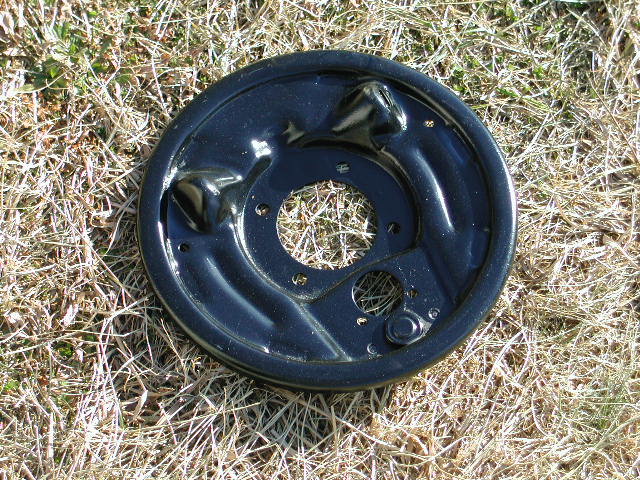
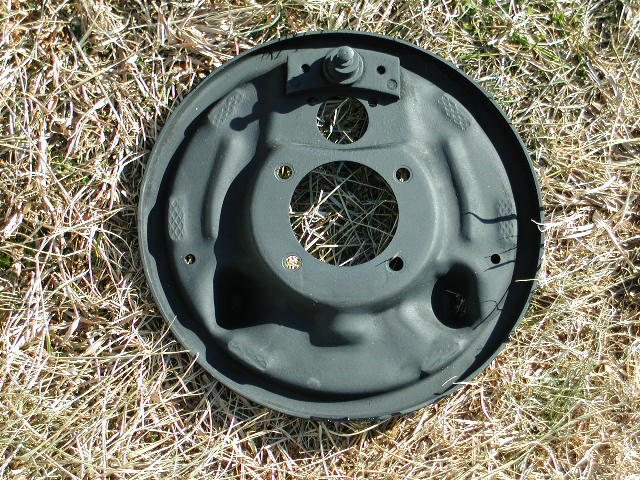
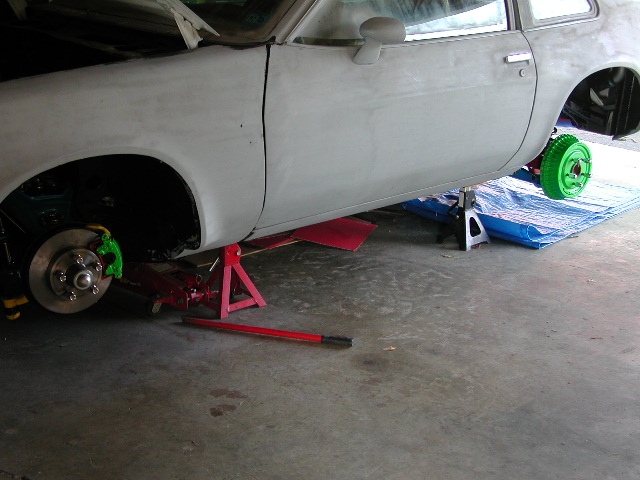
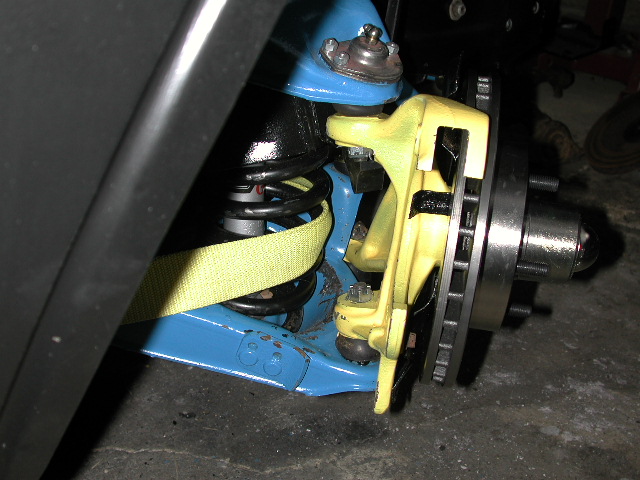
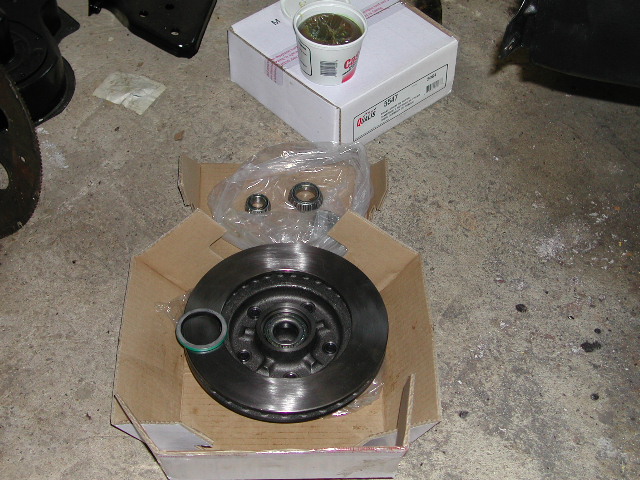
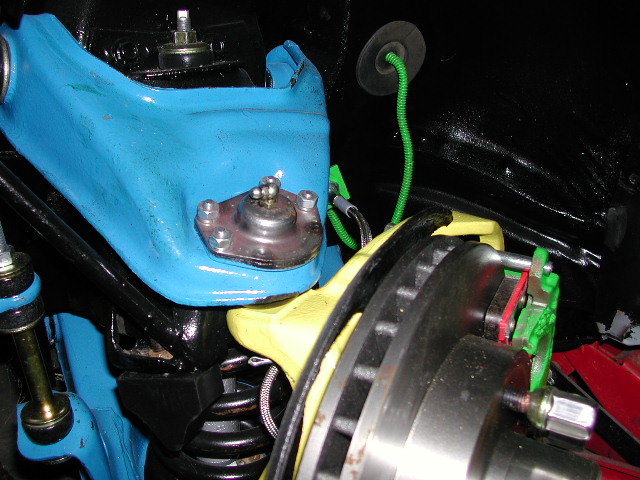
Next I installed the front brakes. The rotors and calipers are for a 1988 S-10, which are the same parts used on a 1992 Camaro (non-1LE). There is a lot of parts sharing in GM cars, and luckily that includes our older H-bodies! The dust/backing plates below look bad because they are very rusty. I used a rust sealing paint on them but they're still ugly. However they should still perform their duties, plus, they're lighter!

For the master cylinder, I decided to go with a Monza power unit. I looked at Camaro and S-10 units but they're just physically bigger, which is bad for a car with an engine bay already very cramped. I worry a bit about the diameter and capacity of the master cylinder, since I'm using S-10 brakes all around. But, the master cylinder is "close" to the S-10 cylinder (22.2 mm vs. 24mm diameter). Basically, this means I'll need more pedal travel compared to using Monza slave cylinders. Hopefully not TOO much more...
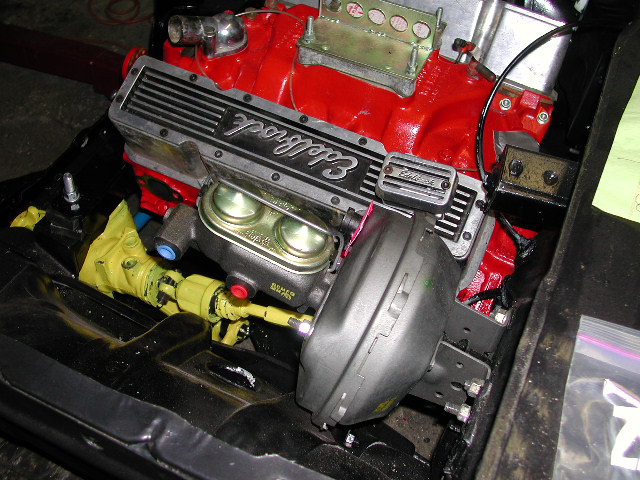
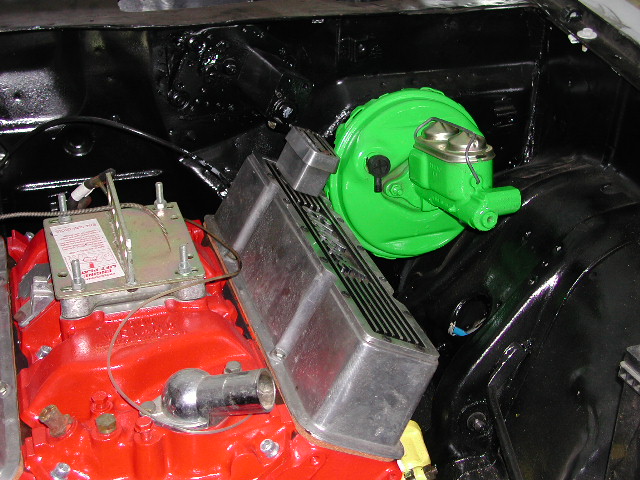
With the master cylinder and slave cylinders installed, it was time to install the lines. For the hard lines, I made sure my originals were in good shape, and just reused them. For the rubber lines, I replaced them with stainless steel braided Russell lines for a first-generation Camaro.


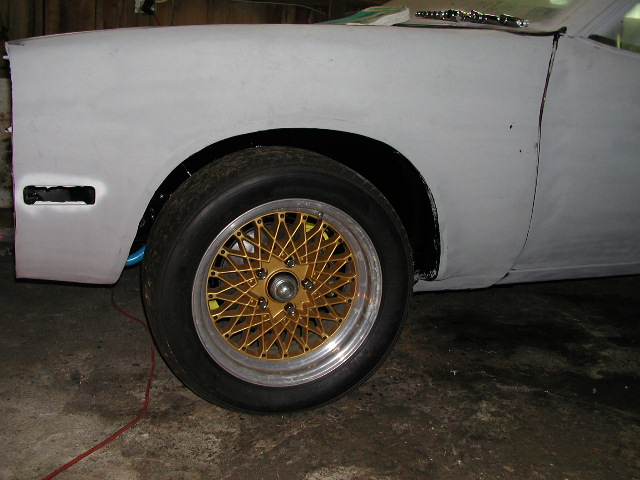
For wheels, I traded for a set of 3rd-gen Camaro wheels. The wheels are not OEM but are actually 16x7.5" wheels (4.5" backspacing) from Keystone. I got a set of used Acura NSX tires, size 225/50ZR16, from a coworker. They were cheap, and I was lucky, because this size has a rolling diameter close to the original tires (175/80R13--talk about pizza cutters). They might not last too long but they're good enough to move the car around while I'm working on it.
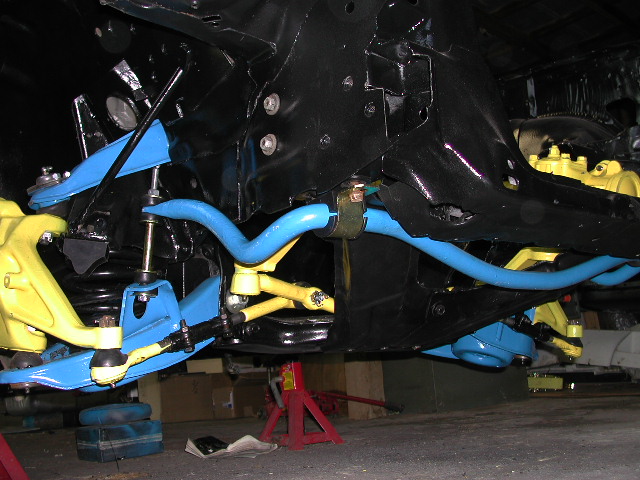
I was worried about the tires rubbing, especially with the wider tires and 4.5" backspacing on the wheels. Here are pictures from the rear, first with the suspension at normal ride height, then fully extended. Note that with the Panhard rod rear, the rear axle tends to move to the left as the suspension extends, since the rod is moving in an arc centered on the upper left side of the car. So it's important to check tire clearance with the suspension at different heights. Unfortunately I haven't found a good way to compress the suspension and take pictures of the clearance.
In the front, things are OK, except one slight problem. At normal ride height, nothing rubs. But when the suspension is extended all the way and the steering wheel is turned all the way, a tire will rub against the sway bar. I should add stops somewhere in the steering linkage to prevent this. Also, the alignment is way off (WAY too much toe-in) and fixing it will also help this problem. The cardboard tube below represents the tube from the Hooker 2129 headers that goes through the wheel well. Realizing the real tube is a little bigger and won't hug the wheel well so closely, it will be a close call--the tires may rub the real tube. In the pictures below, the steering is turned all the way to the right.
On to Engine